
eBike MTB Conversion Project
- Matt
- Dec 16, 2021
- 4 min read
[March 14, 2021]
BBSHD and Wolf V2 build on 2006 Specialized FSR Stumpjumper
I finally pulled the trigger on doing a build with my old Stumpy. I knew I wanted as much battery and power as possible and landed on the Luna BBSHD kit, but what battery?? My biggest concern was where to put the battery. After cutting out the templates Luna has online, and fiddling prior to ordering, I decided I needed to restore the bike a bit first to see if it was truly viable and what all I would need past the ebike parts. After a wash, new cassette, new chain, lots of lube, new brake pads, new shifter cable, new grips, rebuild on the original shifter and switching over to tubeless on the stock rims, I felt I had something that still had plenty of zing.
The Wolf V2 was very close to too big for the triangle, but seemed like it would fit. Onward!
I should say this is my second build of a Bafang mid-drive with my first being on a cargo bike. Aside from the battery fitting, I had no idea how tough the bottom bracket would be to get out. I have the tools and confidence, but that is where I tend to break stuff. :-)
Build of materials:
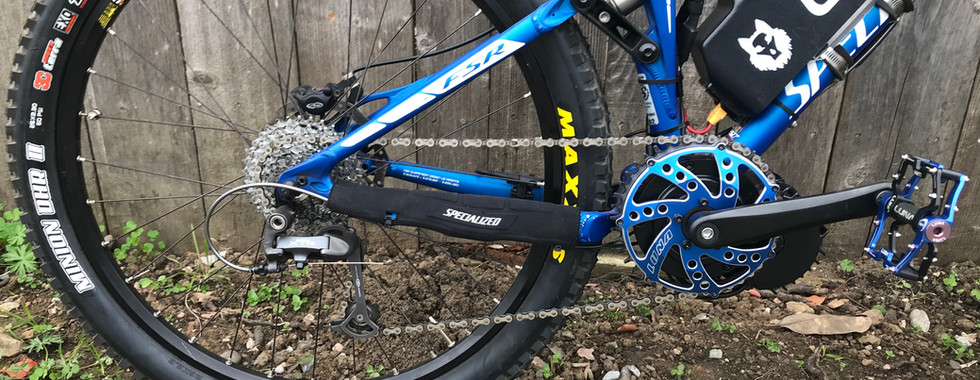
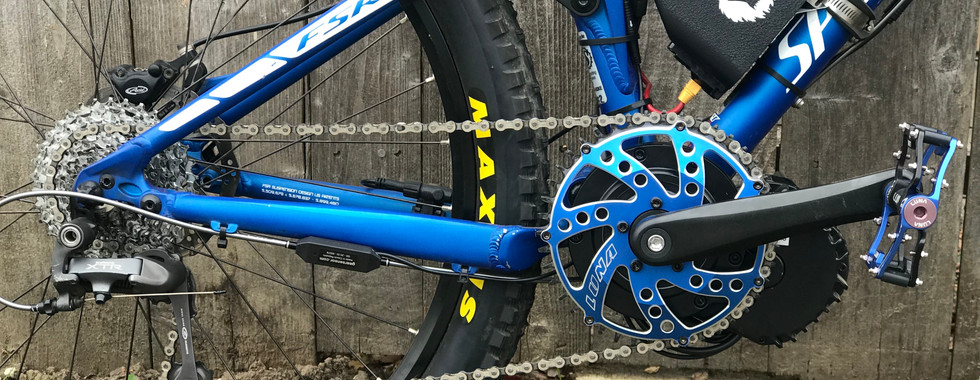
1. BBSHD kit: Bottom Bracket Size: 68mm-73mm (Standard), Bafang BBSxx Left Thumb Throttle, Ebrake Cut Offs: Hydraulic and Disc Brake Sensors with Cut Off (Pair), GearSensor, Custom Luna Eclipse Face, Luna Eclipse Sprocket 42T
2. Luna Perfect Pedals
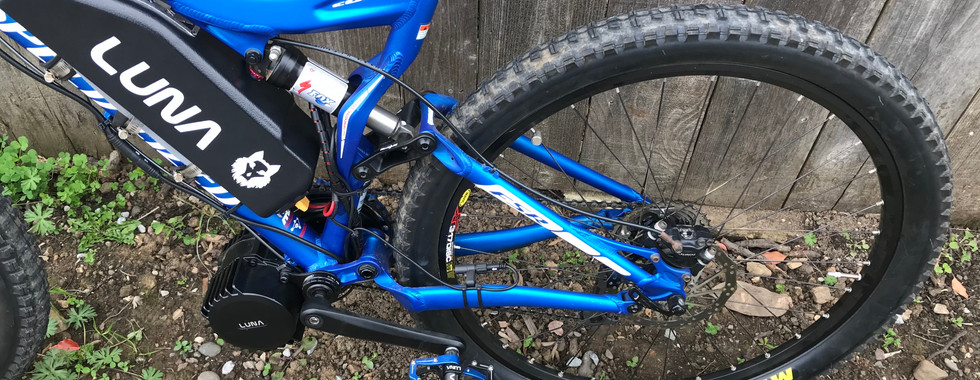
3. 52v Luna Wolf V2 LG MJ1 13.5ah
4. LUNA Wrench BBSHD and BBS02 Mid Drive Installation Tool
5. 4.5mm of bottom bracket washers (spacers)
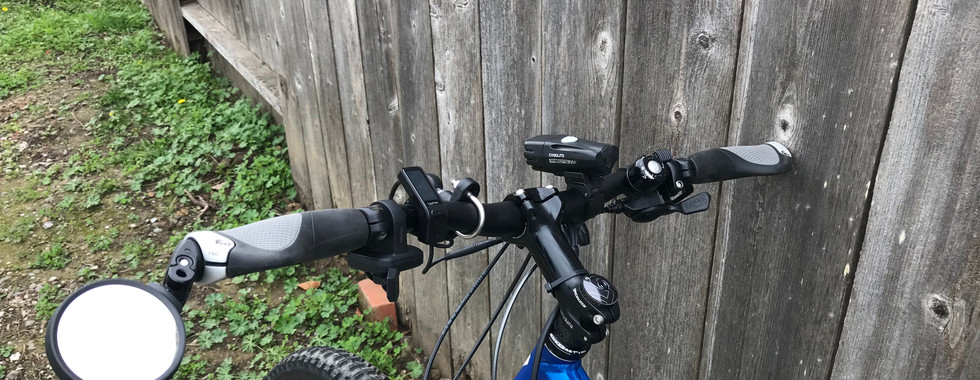
6. Eggrider V2 display
Pulling off the front derailleur, removing the bottom bracket. Was all cake. The pedals were a pain, but that is what breaker bars are for. I quickly had a bike ready for the mid-drive. In it goes no problem. Plenty of room. After putting on the nuts, playing with the included spacers, I realized the new sprocket was just barely nicking the frame. No good. I ended up using the spacers on the two bolts that connects the Bafang mounting plate which are included with the kit. However, this gave me a screwumpy un-flush mounting plate (I forget what this part is called, but it is the plate that bolts to the motor and digs into the frame to keep things secure, I will name it properly in an edit). This un-flush aspect is breaking a cardinal rule. This plate must be flush. So, I had to order number 5 above and add them to the sprocket side. Perfection was achieved.
I can elaborate on the spacers if someone has the need. Luna sells single size, but I did not know what I would need so got a bunch in a kit: AEcreative 10pcs Bike Bicycle 7 8 9 10 11 Speed Cassette freehub Spacer 1mm 1.5mm 2mm 2.5mm 3mm Bottom Bracket Washer BB and here is the link: https://www.amazon.com/gp/product/B0...?ie=UTF8&psc=1
After some test rides, tweaking of adjustments, it is an awesome mountain cruiser. Of particular note is that I do not remove the battery and charge it while it is connected to the motor. Luna says this is fine in their docs. I also use the charger from Luna to do a proper charge.
As you can see in the pictures, the battery fit in the triangle! It is held by three hose clamps and has a bit of Gorilla duct tape in there to prevent scratches. If I ever take it out I will do a cleaner job. There is not enough room to use the magnetic mount unfortunately, but the battery's built-in metal plates have great attachment points.
I may upgrade the brakes, but it seems to do fine with the stock.
I strongly encourage new builders to try and make something work with what they have. I can completely uninstall this motor and put it back to stock in about an hour or so. I am sure I would fiddle with the derailluer longer, but it is easy to move to a different frame if things don't work out.
One puzzle yet to figure out is my new pedals dragging the ground on turns. I clearly do not have the clearance and I am not sure what happened. Maybe the stock Bafang cranks on longer? I had clip in and those pedals were definitely more narrow. Nothing like a good puzzle!
Good luck,
Matt


Update:
Quick update on mods/repairs made since build:
The crank arm length problem is now diminished. It did not occur to me at first that the sag in the rear shock (when unlocked and on trail, which is when the pedals would hit more often) was causing at least part of the problem. I performed a service on the shock with the OEM O-ring kit and now the shock is amazing. I was actually bottoming out when I first took it out on a very technical trail (Tamo Rancho in Marin CA). I continue to test, but it seems my clearance is equivalent to modern ebikes now.
I ended up putting in two spacers and doing a custom build on the rear cassette. I was getting a lot of chain in the front chain ring jamming up due to a pretty angled chain line. This brought be down to a 34T low gear cog, but is more than enough. I used this Sunrace cassette which allowed pretty easy customization of the cassette cogs due to their screwed in retainers rather than rivets: https://www.amazon.com/gp/product/B0...?ie=UTF8&psc=1 I then used these spacers (x2): https://www.amazon.com/gp/product/B0...?ie=UTF8&psc=1 to bring the 34T cog more in line with the front chain ring. This solved everything (after performing a tune of the shifter) and now it runs fantastic.
I will try to post some pictures of the rear cassette. The bike is quite nimble and performs great on single track. I was unfamiliar with the Rock Garden up by Tamo Rancho and hit it in the dark. The bike balanced on top of a waterfall of rocks and while my rear shock bottomed out as I cam down the 6 foot drop, I was able to maneuver the bike body without too much extra effort. Great stuff! I like the fact that I can remove the throttle and become a "Class 1 bike" pretty quickly.